




[pix_dropcap]F[/pix_dropcap]rom the outset, I do not claim to be an underwater photography specialist, or even an underwater photographer, but my love for wildlife has brought me to write this guide to underwater photography. I was recently inspired by good friend Dawie v/d Merwe who took a trip to Zanzibar in April 2015, shot some amazing images, and has allowed me to use them for the purpose of this blog. He is a NAUI – National Association of Underwater Instructors and PADI: Professional Association of Diving Instructors qualified Open Water, Advanced Open Water, Nitrox, and Deep Specialist Diver; this allows him to dive to 40m. The equipment he uses is a Sealife DC 1200. The images captured in this blog were all around a depth of 10-40m (30-120ft) and by Dawie.
So lets begin…
On any given day, if one were to go shooting wildlife, we would more than likely encounter a few bird species, the odd lion, buffalo etc, depending on the national park you visiting. The difference with underwater photography, is that this wont be seen on land, the other worldly creatures like jelly fish, corals & myriads of fish to be found in one location, far exceeds what you would find on land! This is what makes this form of photography so much more interesting. A typical dive is around 45minutes long, a lot needs to done during that time. One needs to keep an eye on your surrounds and not drift off from your group, monitor your breathing apparatus every 30 seconds, adjust your buoyancy and lastly try and capture the image of the subject you are interested in. What adds to this difficulty is, one isn’t in a studio where a reflector can be used, fish move around a lot, light changes at different depths, so different filters need to be used to bring out the colours of those fish. It offers exciting and rare photographic opportunities. Animals such as fish and marine mammals are common subjects, but photographers also pursue shipwrecks, submerged cave systems, underwater “landscapes”, invertebrates, seaweeds, geological features, and portraits of fellow divers.
Obviously one will need the necessary diving courses to be able to dive to these depths, if you snorkel and are in a rich reserve of fish, you will still be able to photograph some amazing fish in the shallows.
The primary obstacle faced by underwater photographers is the loss of color and contrast when submerged to any significant depth. The longer wavelengths of sunlight (such as red or orange) are absorbed quickly by the surrounding water, so even to the naked eye everything appears blue-green in color. The loss of color not only increases vertically through the water column, but also horizontally, so subjects further away from the camera will also appear colorless and indistinct. This effect is true even in apparently clear water, such as that found around tropical coral reefs.
When you are very shallow, just below the surface, in the top 3m (9ft) then white balance alone is absolutely fine. However, once you are deeper than 3m (9ft) the advantages of a filter become more and more apparent. Deeper than 10m (30ft) underwater, all reds all gone, and no amount of filtering can restore them
The main advantages of using a filter, as opposed to white balance alone, are more subtle variations of foreground colour, and probably most noticeable, you get these colours with a richer blue background. Many photos taken with manual white balance are characterised with a completely washed out background water colour. Filters produce a much richer blue. A strong blue background is an important aesthetic element in an underwater photograph.
Underwater photographers solve this problem by combining two techniques:
Another environmental effect is range of visibility. The water is seldom optimally clear, and the dissolved and suspended matter can reduce visibility by both absorption and scattering of light.Underwater filters and red filters do not “add in” color, they subtract other wavelengths. This means you have some loss of light, so you may have to shoot at a higher ISO underwater or wider aperture in order to get a high enough shutter speed in your underwater photo. Except some small improvements, but don’t expect miracles, filters can only help so much.
The use of a flash or strobe is often regarded as the most difficult aspect of underwater photography. Some misconceptions exist about the proper use of flash underwater, especially as it relates to wide-angle photography. Generally, the flash should be used to supplement the overall exposure and to restore lost colour, not as the primary light source. In situations such as the interior of caves or shipwrecks, wide-angle images can be 100% strobe light, but such situations are fairly rare. Usually, the photographer tries to create an aesthetic balance between the available sunlight and the strobe. Deep, dark or low visibility environments can make this balance more difficult, but the concept remains the same. Many modern cameras have simplified this process through various automatic exposure modes and the use of through-the-lens (TTL) metering. The increasing use of digital cameras has reduced the learning curve of underwater flash significantly, since the user can instantly review photos and make adjustments.
Colour is absorbed as it travels through water, so that the deeper you are, the less reds, oranges and yellow colours remain. The strobe replaces that colour. It also helps to provide shadow and texture, and is a valuable tool for creativity.
An added complication is the phenomenon of backscatter, where the flash reflects off particles or plankton in the water. Even seemingly clear water contains enormous amounts of this particulate, even if it is not readily seen by the naked eye. The best technique for avoiding backscatter is positioning the strobe away from the axis of the camera lens. Ideally, this means the flash will not light up the water directly in front of the lens, but will still strike the subject. Various systems of jointed arms and attachments are used to make off-camera strobes easier to manipulate.
When using macro lenses, photographers are much more likely to use 100% strobe light for the exposure. The subject is normally very close to the lens, and the available sunlight is usually not sufficient.
There have been some attempts to avoid the use of flash entirely, but these have mostly failed. In shallow water, the use of custom white-balance provides excellent colour without the use of strobe. In theory one could use colour filters to overcome the blue-green shift, but this can be problematic. The amount of shift would vary with depth and turbidity, and there would still be a significant loss of contrast. Many digital cameras have settings that will provide colour balance, but this can cause other problems. For example, an image shifted toward the “warm” part of the spectrum can create background water which appears grey, purple or pink, and looks unnatural. There have been some successful experiments using filters combined with the raw image format function on some high-end digital cameras, allowing more detailed manipulation in the digital darkroom. This approach will probably always be restricted to shallower depths, where the loss of colour is less extreme. In spite of that, it can be effective for large subjects such as shipwrecks which could not be lit effectively with strobes.
Natural light photography underwater can be beautiful when done properly with subjects such as upward silhouettes, light beams, and large subjects such as whales and dolphins.
Although digital cameras have revolutionized many aspects of underwater imaging, it is unlikely that flash will ever be eliminated completely. From an aesthetic standpoint, the flash emphasizes the subject and helps separate it from the blue background, especially in deeper water. Ultimately the loss of colour and contrast is a pervasive optical problem that cannot always be adjusted in software such as Photoshop or your favourite editing software.
Get close, then get closer! Whatever size your subject is, the most important principle to remember when taking images or video underwater is that you need to shoot through a minimum of water. Water is nearly 800 times as dense as air, and it sucks out color from full spectrum light, so in order for your images to have clarity, contrast, and bright colors, you’ll need to be right on top of your subjects. If you think you’re close enough, you probably should be even a little bit closer. You’ll have to do this by being relaxed and learning how not to spook creatures by letting them get used to you, breathing calmly and approaching with your camera already up. A wider perspective creates intimate images that really engage the personality of your subject, but you need to get as close as possible.
For awe-inspiring underwater photography and videography, you absolutely have to go wide, especially if you want to capture large animals or landscapes. Shooting wide allows you to get very close to a subject for maximum clarity and light while still fitting your subject (say, a dolphin’s entire body) into the frame. The other aspect of getting close is that there’s a minimization of the amount of particulate between you and your subject (suspended in even apparently clear water) that can bounce your flash back, causing a sort of visual fog called backscatter.
Ordinary focal lengths just don’t work well because you’re shooting through too much water and capturing dim, murky images. This need for wide-angle shooting has a direct impact on your camera and housing choices and affects the recommendations we’re making in this article. Macro is the other key lens type to think about. Cameras that can focus close and deliver good magnification are going to be better at capturing the innumerable creatures of the underwater world. Normal and telephoto lenses have virtually no role underwater—leave them at home and save some space in your bag.
Shoot upwards towards the surface, not down (in nearly all cases), so your perspective includes more than just the sea bottom. If you aim your camera down, you are likely going to end up with a jumbled mess as your subject blends into the background of coral to the point where it’s hard to even pick apart the two. Separation is the name of the game; upward angles are key for isolating your subject against the water column. Exceptions: creatures with beautiful backs like sharks, cetaceans, and turtles against contrasting backgrounds like sandy bottoms or open ocean. Trying to shoot is why many photographers opt to use expensive 45 degree or 90 degree viewfinders.
As with any type of photography, proper exposure is critical to get good results when shooting underwater. However, underwater photography adds additional complexity because artificial lighting is used most of the time. This requires balancing light from strobes or video light with the ambient light in the scene, especially in wide angle. This is done by dialing in shutter speed, ISO, strobes, and aperture independently, so it’s good to get comfortable with your camera’s manual mode.
Prepare to shoot a lot. Shooting underwater is a lot more challenging than shooting on land when first starting out, but by taking a large volume of images and experimenting with your lighting and settings, you can make progress very quickly. It’s one of the great advantages to digital photography that you can easily shoot hundreds (if not thousands) of images and review each one. And for learning how to shoot underwater, you’re going to need that ability.
I recently completed a 6 hour online course by a very well known Adobe Certified Instructor, Deke McClelland – Enhancing Underwater Photos with Photoshop. This was also my inspiration to write this blog. It was very informative and the course can be found here.
You will learn how to correct contrast, enhance color, sharpen moving targets and correct distortion. In a nutshell, he uses layer masks, adjustment levels, editing techniques in Adobe Camera Raw and Photoshop in a step-by-step process to achieve the results, that you too can apply to your images. I highly recommend this course, as it will explain the techniques far better than I could ever in this blog.
Here are a few edits of Dawie v/d Merwe’s shoot that I edited, with before and after results. This is the first time I had edited underwater photographs, it was quite challenging, but rewarding all the same. The edits were done in ACR & Photoshop using various filters.
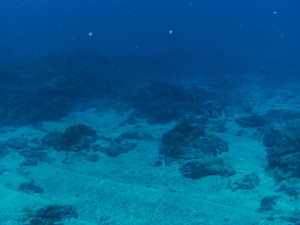
White Tip Shark (Carcharhinus longimanus), Simons Cave, 2 Mile Reef, Sodwana, South-Africa – ©2015 Dawie v/d Merwe
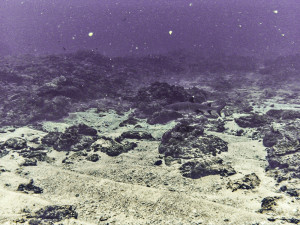
White Tip Shark (Carcharhinus longimanus), Simons Cave, 2 Mile Reef, Sodwana, South-Africa – ©2015 Dawie v/d Merwe
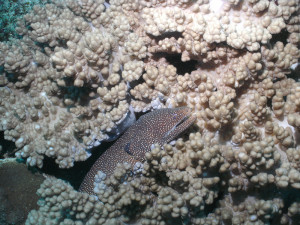
Guinea Fowl Moray (Gymnothorax meleagris), Simons Cave, 2 Mile Reef, Sodwana, South-Africa – ©2015 Dawie v/d Merwe
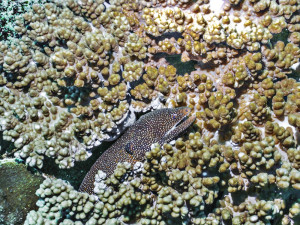
Guinea Fowl Moray (Gymnothorax meleagris), Simons Cave, 2 Mile Reef, Sodwana, South-Africa – ©2015 Dawie v/d Merwe

Potato Bass (Epinephelus tukula), Garden Route, 2 Mile Reef, Sodwana South-Africa – ©2015 Dawie v/d Merwe
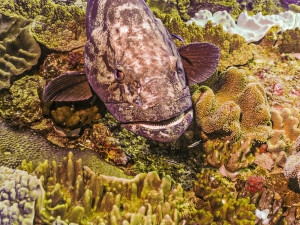
Potato Bass (Epinephelus tukula), Garden Route, 2 Mile Reef, Sodwana, South-Africa – ©2015 Dawie v/d Merwe

Black-Sided Hawkfish (Paracirrhites forsteri), Coral Gardens, 2 Mile Reef, Sodwana, South-Africa – ©2015 Dawie v/d Merwe
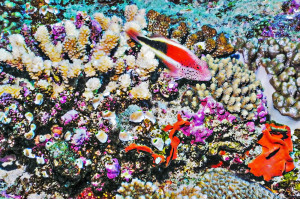
Black-Sided Hawkfish (Paracirrhites forsteri), Coral Gardens, 2 Mile Reef, Sodwana, South Africa – ©2015 Dawie v/d Merwe
Please subscribe to my free monthly NO-SPAM newsletter which will inform you of any new workshops, activities, products and upcoming events.
SUBSCRIBEI am a Western Cape Winelands photographer based in South Africa, photographing locally and internationally. I am a registered NPS (Nikon Professional Services) member, a contributor to Nikon South Africa's social media pages and website. I photograph a broad variety of genres, using film - 35mm, 120, 127 and 4x5" 4x10, 5x7" & 8x10" format as well as digital medium and are very passionate about my work.
My work has been published in various South African newspapers and magazines including Atlantic Gull Magazine with a cover, SA4x4, HIGH LIFE (British Airways Magazine), Getaway Magazine, Wildside Magazine and Weg!/go! Magazine. I finished as a Top Ten finalist in the 2016 Getaway Magazine Gallery Competition, finishing with Highly Commended. The South-African national news broadcaster eNCA has also made use of video footage that I have produced.
Please feel free to comment and share. You can also click on the social media buttons in the footer below and see what I am currently doing, or sign up for my newsletter and follow me.
Until next time, thanks for your support, appreciating my work and reading my blogs.
Craig Fouché, Rogge Cloof, Sutherland, South-Africa ©2020 Kirsten Frost Photography