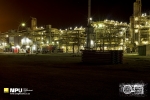


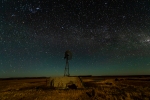
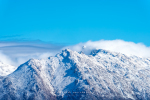


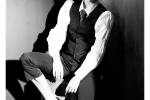

In infrared photography, the film or image sensor used is sensitive to infrared light. The part of the spectrum used is referred to as near-infrared to distinguish it from far-infrared, which is the domain of thermal imaging. Wavelengths used for photography range from about 700 nm to about 900 nm. Film is usually sensitive to visible light too, so an infrared-passing filter is used; this lets infrared (IR) light pass through to the camera, but blocks all or most of the visible light spectrum (the filter thus looks black or deep red). (“Infrared filter” may refer either to this type of filter or to one that blocks infrared but passes other wavelengths.)
When these filters are used together with infrared-sensitive film or sensors, “in-camera effects” can be obtained; false-color or black-and-white images with a dreamlike or sometimes lurid appearance known as the “Wood Effect,” an effect mainly caused by foliage (such as tree leaves and grass) strongly reflecting in the same way visible light is reflected from snow. There is a small contribution from chlorophyll fluorescence, but this is marginal and is not the real cause of the brightness seen in infrared photographs. The effect is named after the infrared photography pioneer Robert W. Wood, and not after the material wood, which does not strongly reflect infrared.
The other attributes of infrared photographs include very dark skies and penetration of atmospheric haze, caused by reduced Rayleigh scattering and Mie scattering, respectively, compared to visible light. The dark skies, in turn, result in less infrared light in shadows and dark reflections of those skies from water, and clouds will stand out strongly. These wavelengths also penetrate a few millimeters into skin and give a milky look to portraits, although eyes often look black.
There are two ways of capturing this form of photography on “film”. The first being a permanent in camera IR conversion which requires the removal of the IR blocking filter covering the sensor, replaced with an IR sorting filter which allows a certain percentage of IR light through to the sensor. This requires the white balance to be preset. The beauty of this is, one can shoot “normal” speed images handheld. The other other option requires an IR filter to be attached to the front of the lens, this is a much slower way of capturing the image, as most exposure times are 30 seconds and longer. Needless to say a tripod if essential for this type of work. Click on this YouTube link to see how the conversion is done.
The satisfaction of infrared photography is the creative side to it, one never knows how the image will turn out; the post processing allows for wide artistic expression for the end result.
The converse to IR photography is UV photography, this is a bit more difficult as the range is a tight 350nm to 400nm space. There is also limited information regarding this form of photography on the internet. It can, however be used creatively with some imagination, and under correct lighting.
Click on the images below to view an enlarged single image.
All my images are available for purchase as prints. Digital images can be used under license agreement. Should you wish to purchase or license my images, please click here for more information, so I can assist you with your needs.
There are no upcoming events.